How to Connect Smart Home Devices Without Frustration
Navigating the world of smart home connection can often feel like assembling IKEA furniture with a single, poorly translated instruction sheet. It promises convenience but frequently delivers a baffling array of blinking lights, cryptic error messages, and a sudden urge to throw your new gadget out the window. However, the promise of a truly smart home – one where your lights, thermostats, and security systems work in seamless harmony – is well worth pursuing. With the right approach and a clear understanding of the process, you can bypass the common pitfalls and achieve a frustration-free setup.
This guide is designed for the smart, time-poor reader who wants practical, actionable steps to get their smart home devices online without the usual headaches. We’ll demystify the pairing process, highlight crucial network considerations, and equip you with troubleshooting tips that actually work. According to Statista (2024), the global smart home market is projected to reach US$155.10 billion this year, reflecting widespread adoption, yet connectivity remains a pain point for many. Let’s make your smart home experience part of the success story, not the frustration statistics.
Key takeaway: A systematic approach to smart home connection can eliminate common frustrations and ensure your devices integrate seamlessly.
What you’ll need
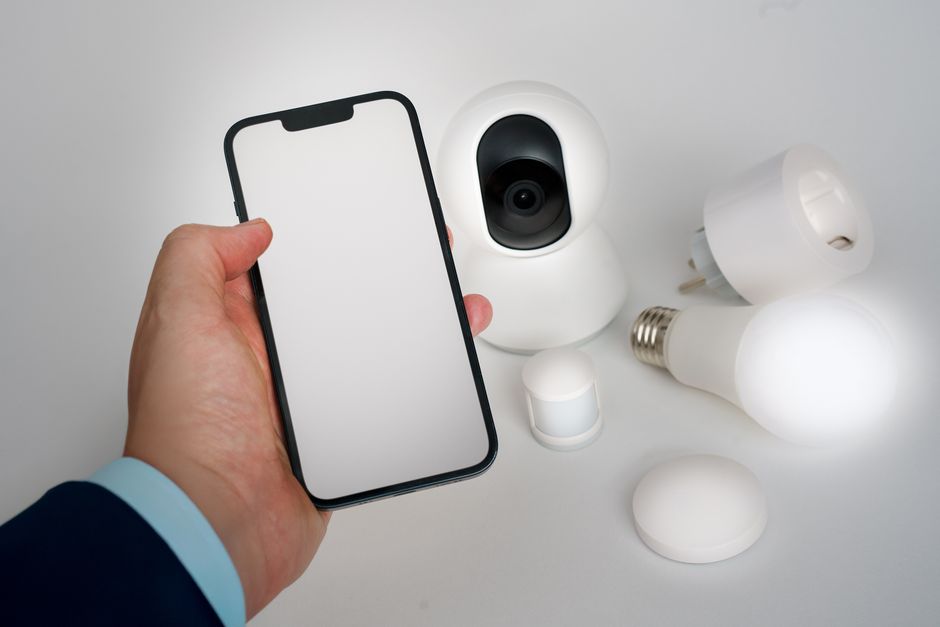
- Your new smart home device(s)
- A smartphone or tablet with internet access
- The device’s companion app (downloaded from App Store or Google Play)
- A stable Wi-Fi network (preferably 2.4GHz for most devices)
- Your Wi-Fi network name (SSID) and password
- Account credentials for the device manufacturer’s service (if required)
- Patience and a methodical approach
Key takeaway: Gather all necessary physical items and digital credentials before starting the setup process to avoid interruptions.
Step-by-step
-
Prepare your network and device environment. Ensure your Wi-Fi router is on and functioning correctly. For many smart home devices, particularly older or simpler ones, connecting to a 2.4GHz Wi-Fi band is essential, as 5GHz bands are often unsupported. Move your smart device close to your Wi-Fi router for the initial setup to guarantee a strong signal.
-
Unbox and power on your smart device. Carefully remove the device from its packaging and connect it to a power source. Most devices will indicate they are ready for pairing by blinking an LED light or emitting a specific sound. Consult the quick start guide for your specific device to understand its pairing mode indication.
-
Download and open the companion app. Search for the official app for your smart device in your smartphone’s app store. Install it and launch the application. This app serves as the primary interface for setup, configuration, and ongoing control of your device.
-
Create or log in to an account. Many smart home ecosystems, such as Philips Hue or SmartThings, require you to create an account with the manufacturer. If you already have one, log in. If not, follow the on-screen prompts to register. This account often enables cloud features and remote access.
-
Initiate device pairing within the app. Look for an “Add Device,” “Pair Device,” or a “+” icon within the companion app. Select your specific device type from the list. The app will then guide you through the process, often using Bluetooth or a temporary Wi-Fi network created by the device itself to establish the initial connection.
-
Follow in-app instructions to connect to your home Wi-Fi. The app will prompt you to provide your home Wi-Fi network name (SSID) and password. Carefully enter these credentials. Some devices may require you to briefly switch your phone’s Wi-Fi network to the device’s temporary network before returning to your home network, while others use QR codes for quick pairing.
-
Name and configure your device. Once connected, the app will usually ask you to give your device a unique name (e.g., “Living Room Light,” “Front Door Camera”). This is crucial for organization and for voice assistant commands. You may also be prompted to assign it to a room or group and customize initial settings like brightness or motion sensitivity.
-
Test its functionality. After setup is complete, immediately test the device using the app. Turn a light on and off, check a camera feed, or adjust a thermostat. Confirm it responds reliably to your commands. This verifies the **smart home connection** is stable and the device is ready for use.
Key takeaway: A systematic eight-step process, starting with network preparation and ending with functional testing, ensures a smooth device setup.
Common problems and fixes
Device not found or won’t pair
A common mistake here is assuming the device is faulty when it’s often a network issue. Ensure your device is truly in pairing mode (check its LED pattern) and is within close proximity to your Wi-Fi router. Many devices only support 2.4GHz Wi-Fi, so make sure your phone is also temporarily connected to the 2.4GHz band during setup if your router broadcasts both. Try power cycling the smart device (unplug and replug) or performing a factory reset, which often involves holding a button for several seconds.
Wi-Fi connection issues
From experience, a crowded Wi-Fi channel or weak signal is a frequent culprit. Reboot your Wi-Fi router and modem to clear any temporary glitches. Check your router’s settings to ensure MAC address filtering isn’t enabled, or if it is, add your device’s MAC address. If you have a mesh Wi-Fi system, ensure you’re setting up the device near one of the primary nodes, and sometimes temporarily disabling mesh steering (which forces 5GHz) can help for 2.4GHz-only devices.
App connection errors
If the companion app is the source of frustration, start by ensuring it’s updated to the latest version. Clear the app’s cache and data on your smartphone, or even uninstall and reinstall it. This often resolves corrupted data issues. Also, check your phone’s permissions for the app; it usually needs access to local network devices, Wi-Fi information, and sometimes Bluetooth.
Voice assistant integration fails
After successfully connecting a device to its native app, integrating with Google Home or Amazon Alexa can still be tricky. Ensure you’ve linked the correct manufacturer account within your voice assistant app (e.g., link “Philips Hue” account to “Google Home”). Double-check that the device is named uniquely and isn’t conflicting with other devices. Sometimes, simply unlinking and relinking the skill or service within the voice assistant app can refresh the connection and resolve the issue.
Key takeaway: Most common connection problems stem from network incompatibilities or temporary glitches, often resolved by basic troubleshooting steps.
When this won’t work
While this guide covers the vast majority of smart home devices, there are edge cases where these steps might not be sufficient. Proprietary ecosystems that rely solely on a dedicated hub without direct Wi-Fi connectivity (like some older Zigbee or Z-Wave devices) will require you to set up the hub first, then pair devices to the hub itself. Additionally, highly secure enterprise or guest Wi-Fi networks with captive portals or strict client isolation will likely prevent devices from connecting or communicating, as they often block peer-to-peer traffic and internet access without browser authentication. Finally, devices that are simply incompatible with your region’s Wi-Fi frequencies or security protocols are rare, but can occur with grey-market imports.
Key takeaway: These steps primarily apply to Wi-Fi-connected devices; proprietary hubs or highly restricted networks require different approaches.
Conclusion
Achieving a smooth **smart home connection** doesn’t require a degree in network engineering; it simply demands a methodical approach and an understanding of common pitfalls. By preparing your network, carefully following the app’s instructions, and knowing how to troubleshoot, you can transform a potentially frustrating experience into a rewarding one. Remember that most devices prefer 2.4GHz Wi-Fi, proximity to the router aids initial setup, and a simple power cycle can fix many issues. A Parks Associates (2023) study found that 36% of smart home device owners experienced connectivity problems, highlighting that you’re not alone, but also that these issues are common and often resolvable.
The satisfaction of seeing your smart devices come to life, working in unison, is well worth the initial effort. Now that your devices are online and communicating, your next step is to explore automation routines. Dive into your device’s app or your central smart home hub (like Google Home or Apple HomeKit) to create schedules, set up triggers based on motion or time of day, and link devices together for true home automation. This is where your smart home truly begins to shine, making your daily life more convenient and efficient.
Key takeaway: A systematic approach to smart home connection is key, and with devices now connected, focus on exploring automation routines for enhanced smart home utility.
Cover image by: Jakub Zerdzicki / Pexels